Adding a Custom Field using API
After a high-level overview of configuring the captured fields and the guide to updating the extraction schema using Excel, let's take a look what it takes to do a common operation with a schema - adding a custom field. For a quick overview of the schema adjustments process, you can skip to the video at the end of this article.
Download the schema as XLSX file:
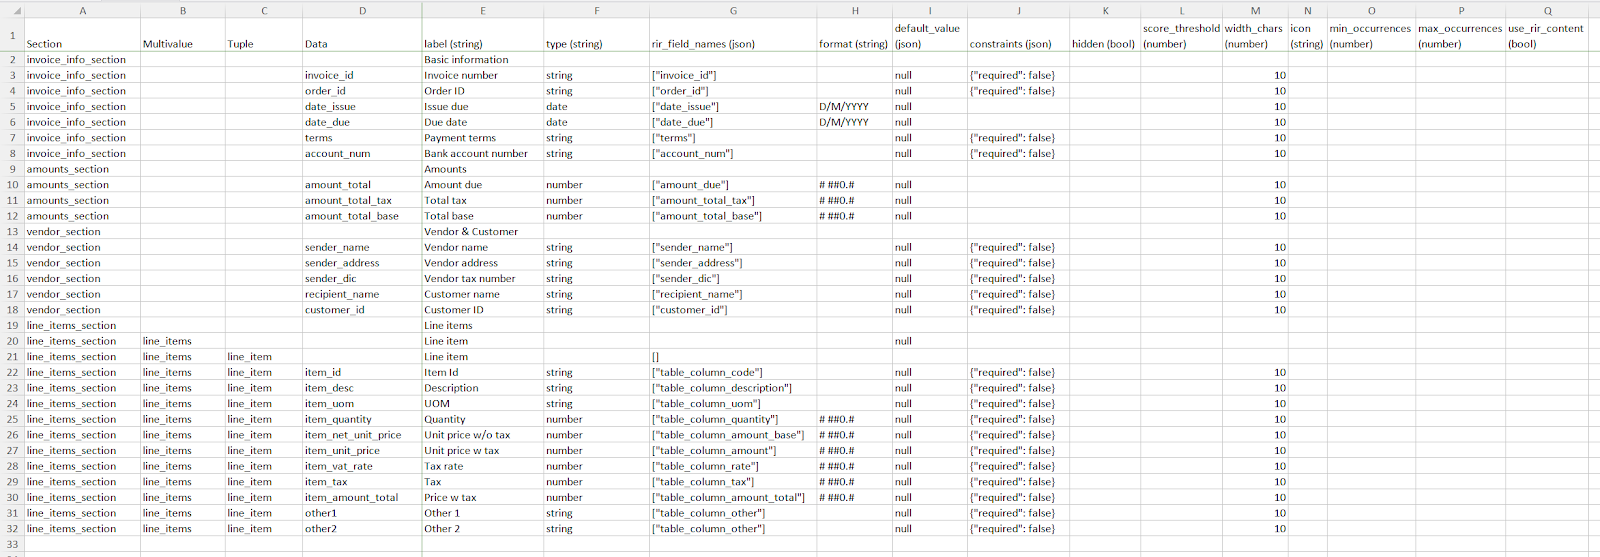
rossum> schema get 51333 --format xlsx -O demo_schema.xlsxSuch an XLSX file could look like this:

To create a custom field, add a new row to the XLSX file. The columns that need to be filled out are:
- section: defines what section does the datapoint belong to
- data: the unique id of the datapoint. When creating new datapoints, we recommend to follow the syntax style of the rir_field_names, especially for customers who plan to have their own custom model trained.
- label: the name of the field as shown in the UI
- type: one of string, date, number, enum
- rir_field_names: if this is an empty list
[], this field is not mapped to any output of the AI engine and is not extracted automatically. However, it can contain a name of an AI engine field, typically one of the pre-trained fields as per the linked list. **Mapping to an AI engine field name not provided by Rossum will have no effect.
You can even map your field to more AI outputs as a fallback option. For example, if an invoice_id output did not extract any data, the data that were extracted by the var_sym output will be used instead:
Remaining columns of the XLSX correspond to the attributes that are explained in the Schema Content section of the API reference documentation.
Once you have finished your adjustments, upload the modified file version back to Rossum, in JSON or XLSX format:
rossum> schema update 51333 --rewrite demo_schema.xlsxYou can find a more detailed guide on how to add dropdown select box here.
Video Guide
Updated 7 months ago