Confident Automation In Practice
Confident mode Automation in practice
In this article, you will experience confident automation from a more practical point of view. The goal would be very straightforward:
- Turn on confident automation on a Queue
- See whether the document was automated
- Find reasons why not
- Adjust confident mode automation in order to let the document through
- Process the document again and check that it was automated correctly
- Upload a very similar document and see whether it gets automated too
- Boost the confident automation even more
Setting up an account
First, you should create a new trial account.
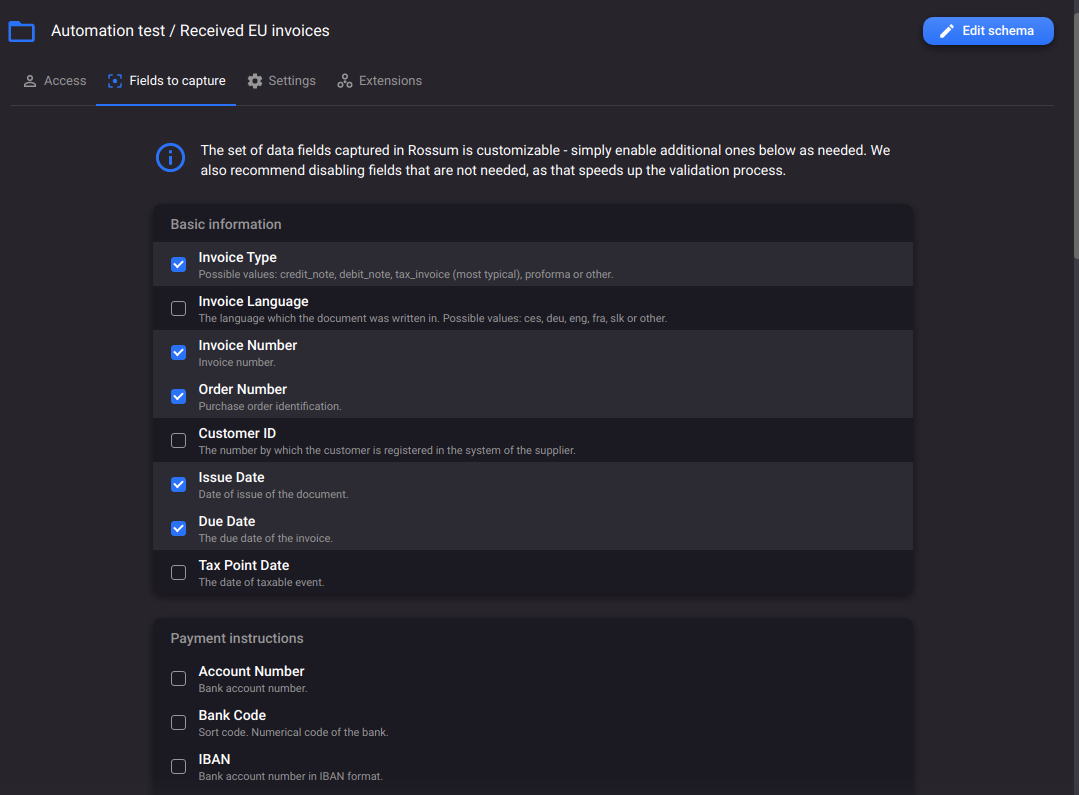
For the first part of this example, let’s focus only on header fields. Turn off all the line item fields and “Notes” fields in the Fields to capture part. And you will be left with:
- Document ID
- Purchase Order Number
- Issue Date
- Due Date
- Account Number
- Bank Code
- IBAN
- Subtotal
- Total Tax
- Amount Due
- Currency
- Vendor Name
- Vendor Address
- Customer Name
- Customer Address

Adjusting fields to capture.
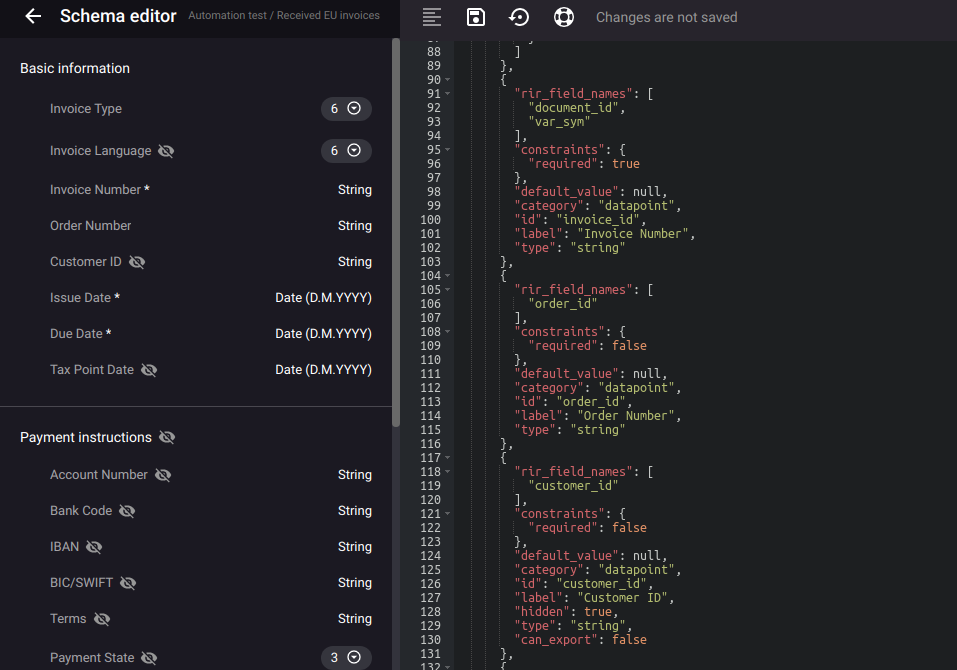
Secondly, specify what fields are required when performing the data capture (i.e. you always need a value for those fields when exporting the data). Add the following constraint to selected fields:
"constraints": {
          "required": true
        }
In our example, the required fields will be:
- Document ID
- Issue date
- Due date
- Amount Due
- Subtotal
- Sender name
The required fields can be quickly identified by an asterisk (*) next to the field label in the schema editor.

An example of such a schema can be found here.
Turning ON confident automation
Once you are done with the schema, navigate to the Queue settings tab where you will set a confident-level automation. Just select “Confident” in the “Automation level” dropdown.

Enabling confident automation.
One of the parameters that can be set in the app for confident automation is the “Default score threshold”. When extracting values, Rossum can return a confidence score for all header fields and if the score is over a specified threshold, such values could be automated. By default the score threshold is set to 0.975 (in range 0-1) for all the fields in the schema.
You can read more about the Confidence scores here.
Uploading the first document in Rossum
Let’s go back to the document dashboard and upload a document. In this example, we are using this document.

Uploading first document.
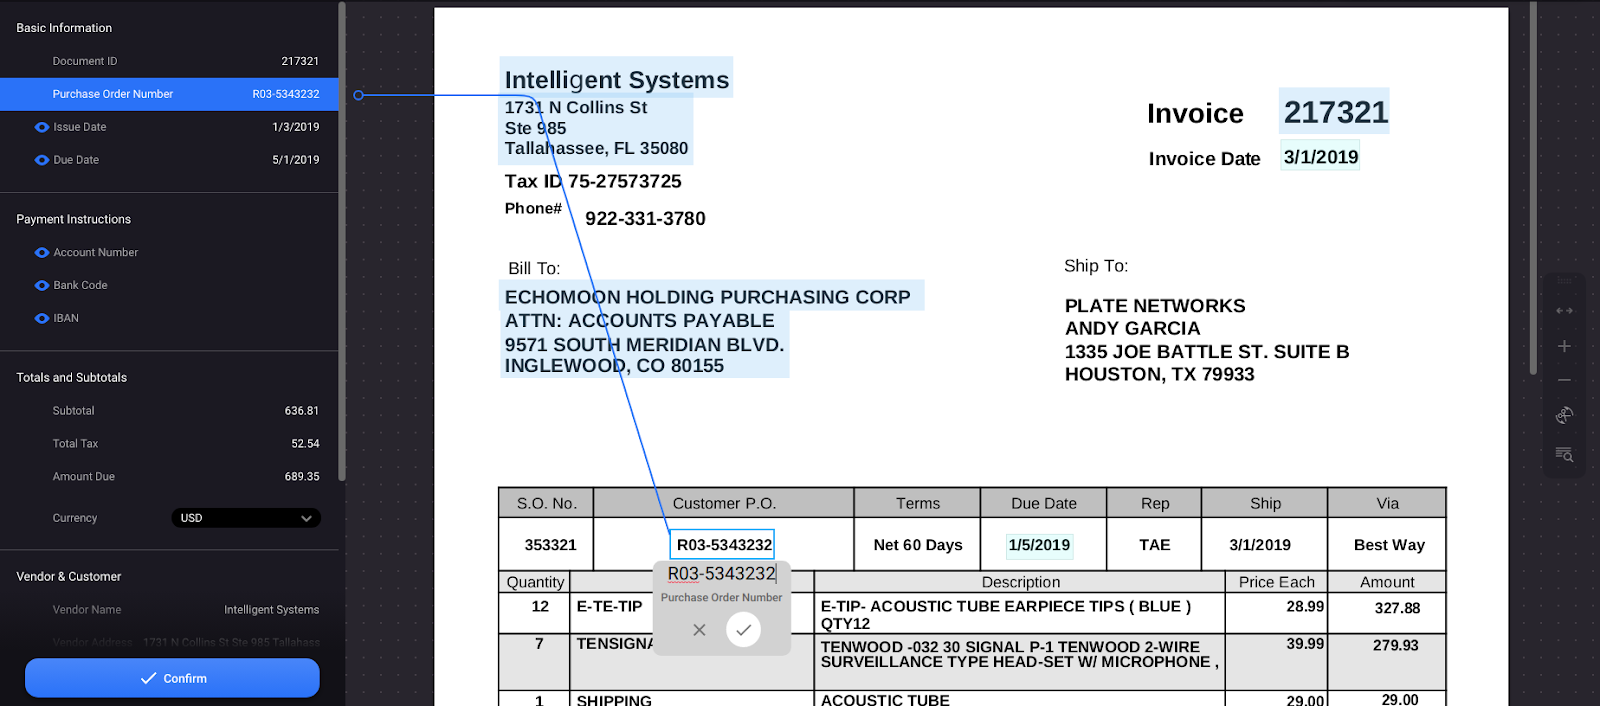
Once the processing of the document is finished, you can open the document. All the required fields are captured, and the rest of the non-required fields can be left empty since their values cannot be found on the document.
However you probably expected this document to be automated right away, but the document was stopped for review. On the document, you can see that the problematic fields that Rossum could not automate were:
- Purchase Order Number
- Issue Date
- Due Date
Now the question is, “Why weren’t such fields automated?”
How to check why some fields were not validated
To get more detailed information about the documents to be automated, you can get the automation_blocker information that is linked to the annotation over the API with Postman.
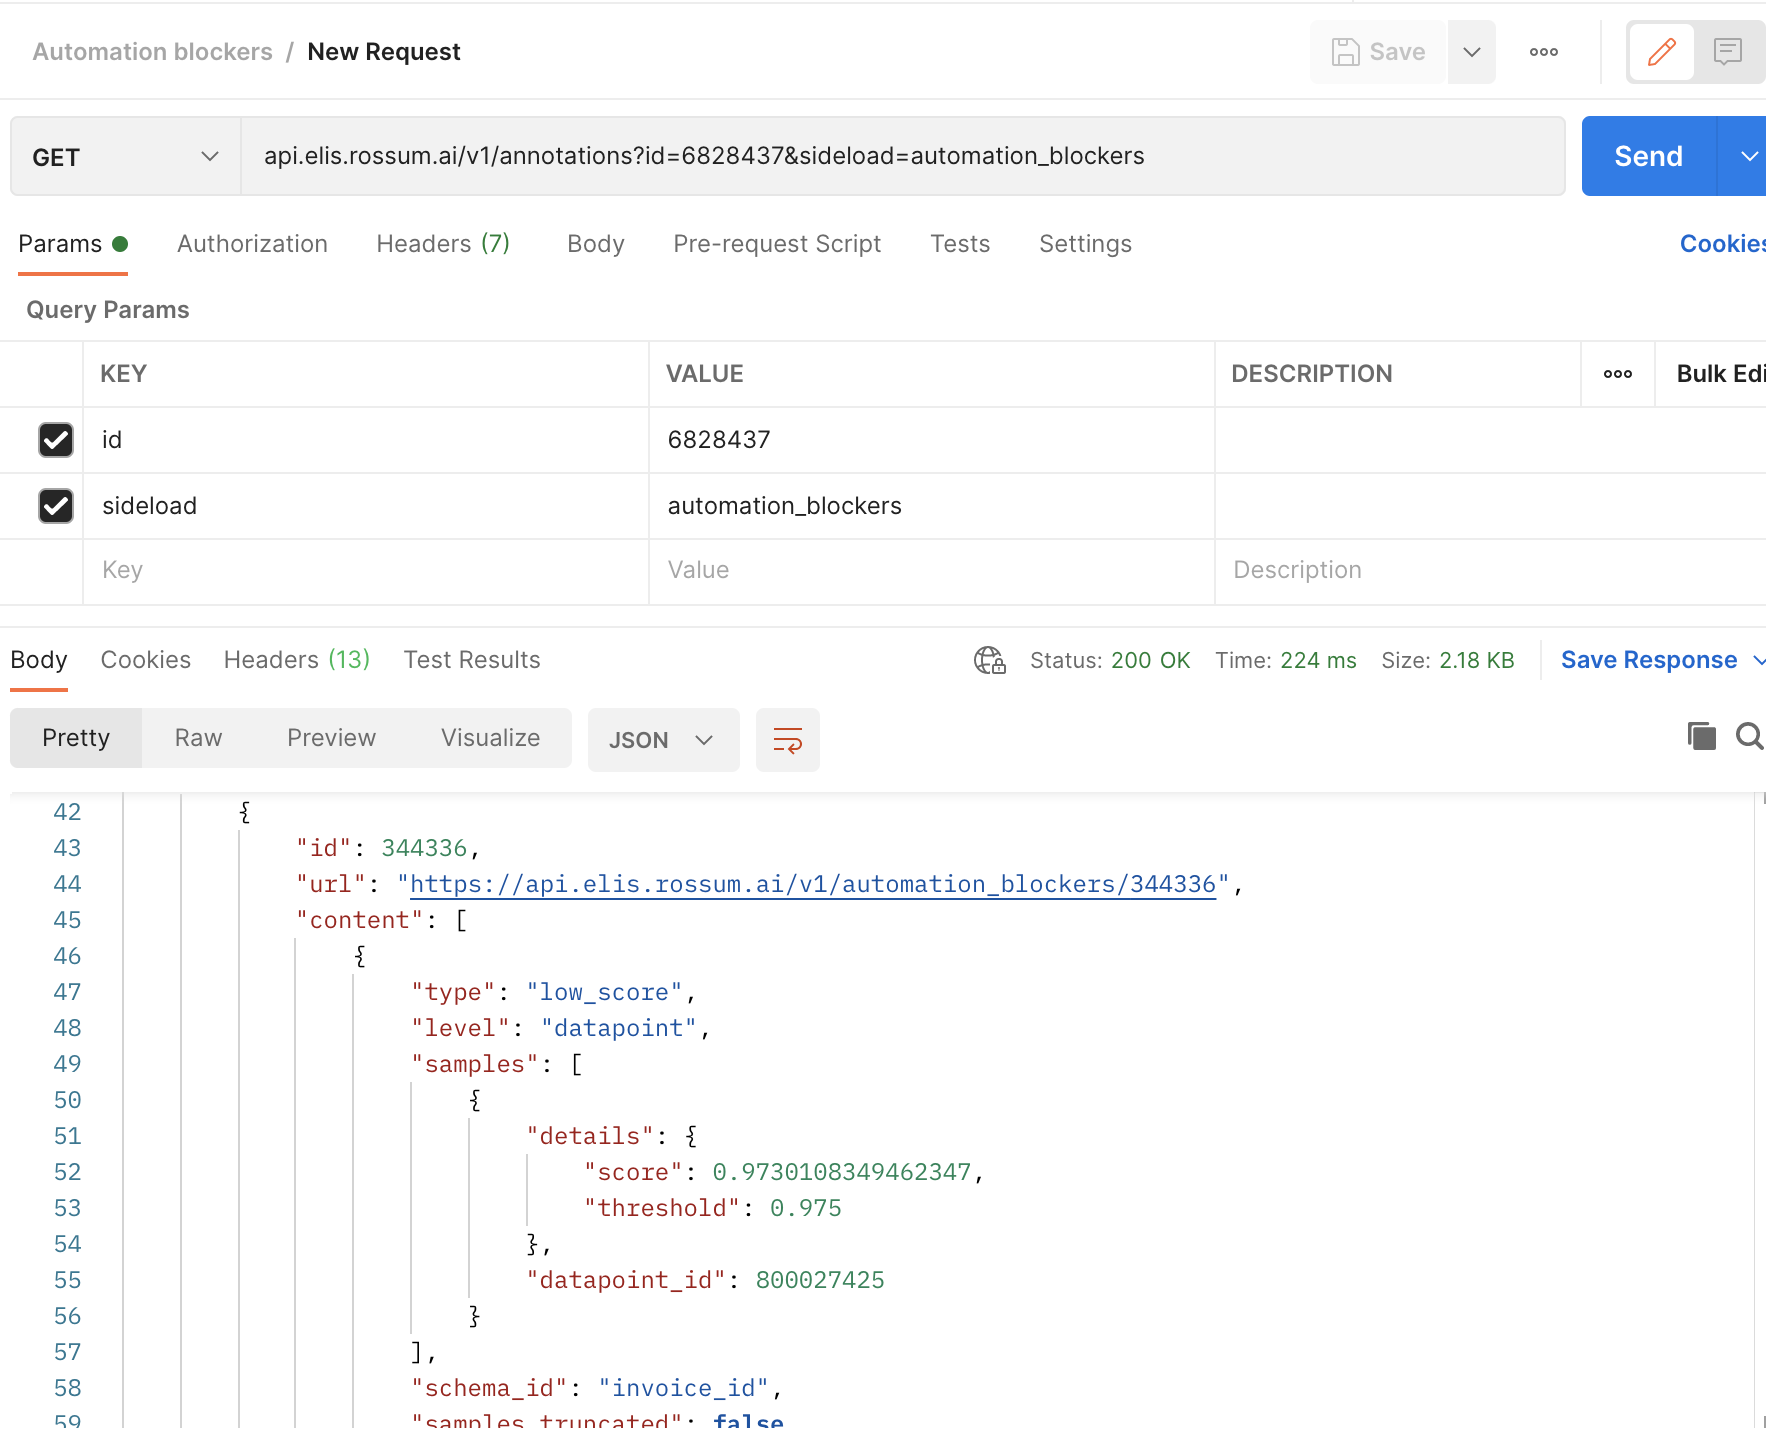
Run a GET request on a list of annotations where you will specify the IDs of the annotations you want to see while sideloading automation_blocker) field. See the POSTMAN example below. And remember to add the HTTP Authorization token as explained here.

Get the automation blockers of specific annotations.
In the request’s response, you will see what fields blocked the automation.
How to make this setup more scalable
It would be cumbersome to reset the threshold for each field after a new document is processed. It is best to do initial testing to determine the best setup for your use case. The testing could look like this:
- Upload one sample of each layout for your most frequent suppliers (let’s say 30 samples altogether)
- Get the content of the annotations after the documents are processed for the first time
- Search for the extracted value and its confidence. Based on the confidence level scores you are seeing, choose the correct threshold to start with
- Upload the same documents to see if they were automatically confirmed. If not, find out why, as described above.
- Upload another set with new documents and see how the automation setup worked for them. Adjust the thresholds if necessary.
Automating already seen layout
Of course, your end goal ambition will be to automate documents that have the same layout but slightly different values in comparison to the already confirmed documents. Try downloading another instance of the already processed document, upload it to the same queue and see that it gets automated.
How to know which documents were automated
To know which documents were automated - you can list annotations over the API and check the attribute “automated”: true/false. In the future, such information should be shown in the UI, together with an automation chart on the usage reporting dashboard.
More aggressive confident automation mode
In order to make the automation even more aggressive, you could set up a very permissive history based automation on your Queue.
For example, you coul PATCH the queue.settings with this configuration:
"autopilot":{
 "enabled":true,
 "automate_fields":
  {"rir_field_names":
    ["account_num",
    "bank_num",
    "iban",
    "bic",
    "sender_dic",
    "sender_vat_id",
    "sender_ic",
    "sender_name",
    "sender_address",
    "recipient_dic",
    "recipient_vat_id",
    "recipient_ic",
    "const_sym",
    "recipient_name",
    "recipient_address"],
    "field_repeated_min":1},
  "search_history":
    {"rir_field_names":
      ["sender_ic",
      "sender_vat_id",
      "sender_dic",
      "account_num",
      "iban",
      "sender_name"],
    "matching_fields_threshold":1}}
Now, if you process a document from a vendor whose invoice was already exported (document has to be in “Exported” tab) in Rossum and the “Vendor name” or e.g. “IBAN” would be correctly captured by the AI, then fields pre-filled by rir_field_names listed in automate_fields could be automated if its value was seen already in the history for the given vendor.
Updated 7 months ago