Embedding Rossum in IFrame: Best Practices
There are several best practices you should know about when embedding the Rossum validation screen into your application.
How to open documents in Rossum from your own application
When you have your own document management application, you usually want your users to access Rossum only for performing data capture. The rest of the actions, such as document management and other workflows, are managed in your own application. Therefore, the first question you should answer is how you would like to manage your users in Rossum. There are two options available.
One Rossum user account for everyone
You would have only one Rossum user account that is used for getting limited one-time access tokens for each document, no matter what user is working in your application. This option is easy to set up and integrate.
Have a new Rossum user account for each of your users
With this option, you will be able to distinguish the modifiers of the document which might be necessary for your workflow. For example, if you want to track change logs for security reasons. However, setting up the workflow for creating the new users and letting them access Rossum might be pretty complex to implement.
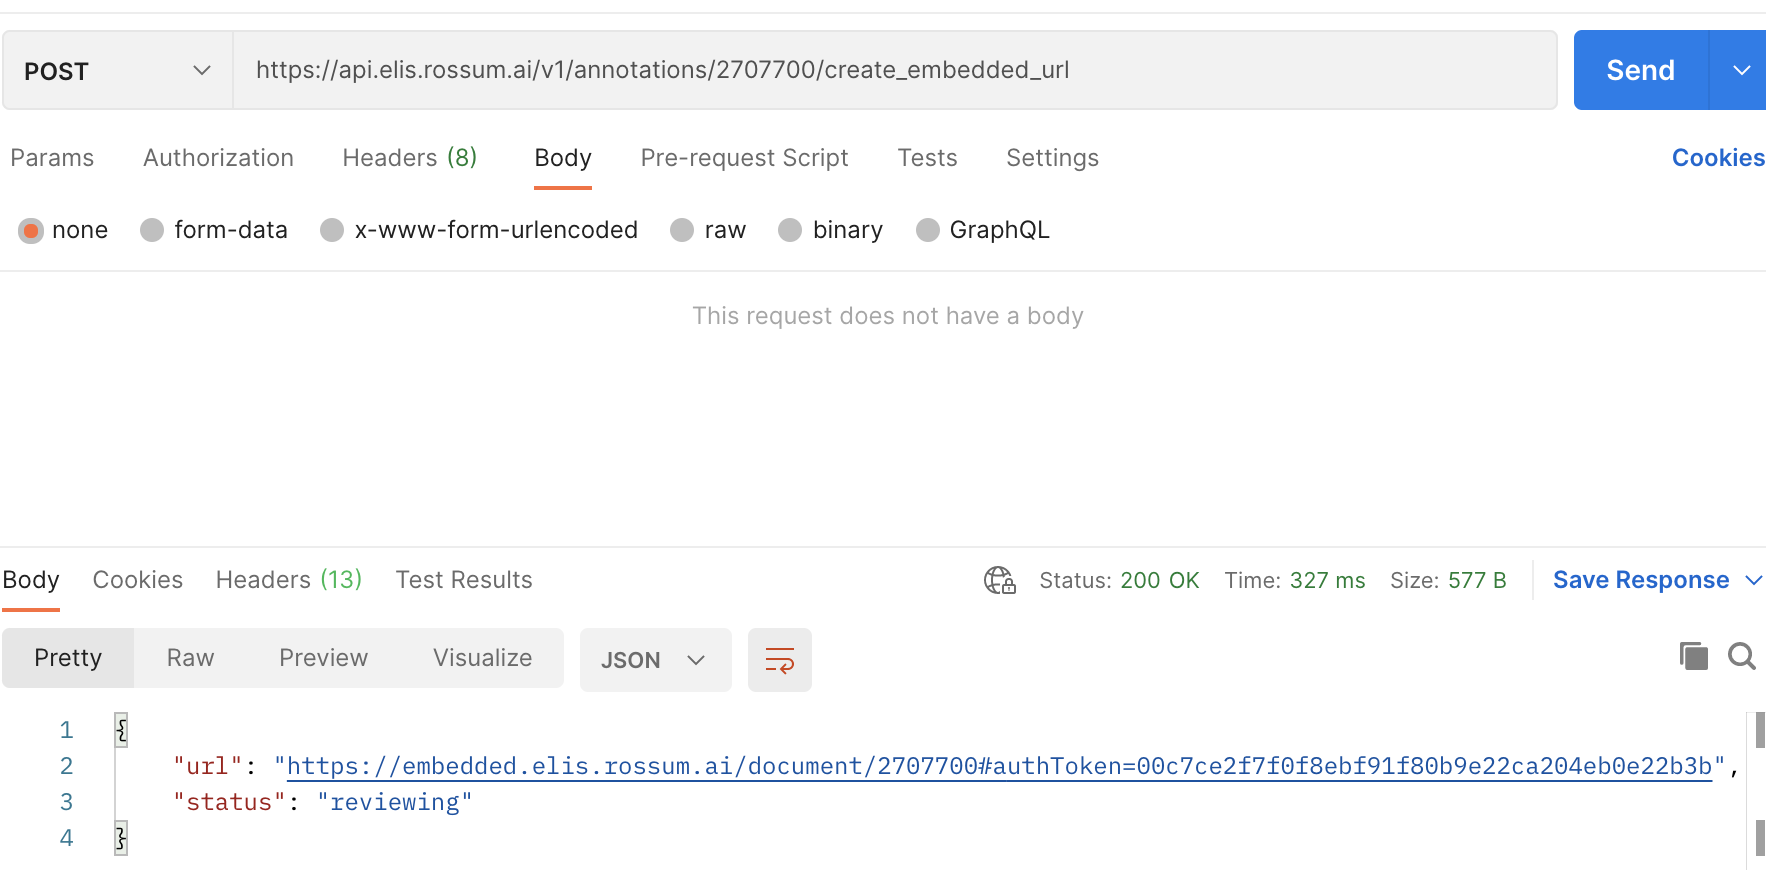
For both options, we have created an endpoint create-embedded-url-for-annotation that will return a URL that can be used in the browser iframe/popup window. The URL includes a token valid only for this document, only for a limited period, and only for this user. Moreover, this view is limited to Rossum's validation screen, where the data capture is performed. The user cannot navigate to the Rossum standard document dashboard or settings.
After getting the URL, you would redirect the user to Rossum (or show IFrame), where the user can perform the data capture.

Generating the One-Time document URL
The best practice for generating the one-time document token is to create your own API endpoint on your server backend. It is where you would store the credentials of the Rossum user account. Anytime a user clicks on the button "Open document in Rossum" in your own application, you would send a request to your API endpoint that would take the Rossum user credentials and call the create-embedded-url-for-annotation. Afterwards, the Rossum document URL would be returned to your user.
It is good to have this in your backend because of the CORS restrictions in browsers. Rossum is limiting access so that the API can be called only from web pages that are on the same "rossum.ai" domain. If not, the browser will block the request to Rossum's API, and you will not be able to get the one-time document token.
Such Rossum's approach prevents users from embedding the Rossum credentials directly in the source code of the webpage and enforces higher security.
Opening Rossum in IFrame
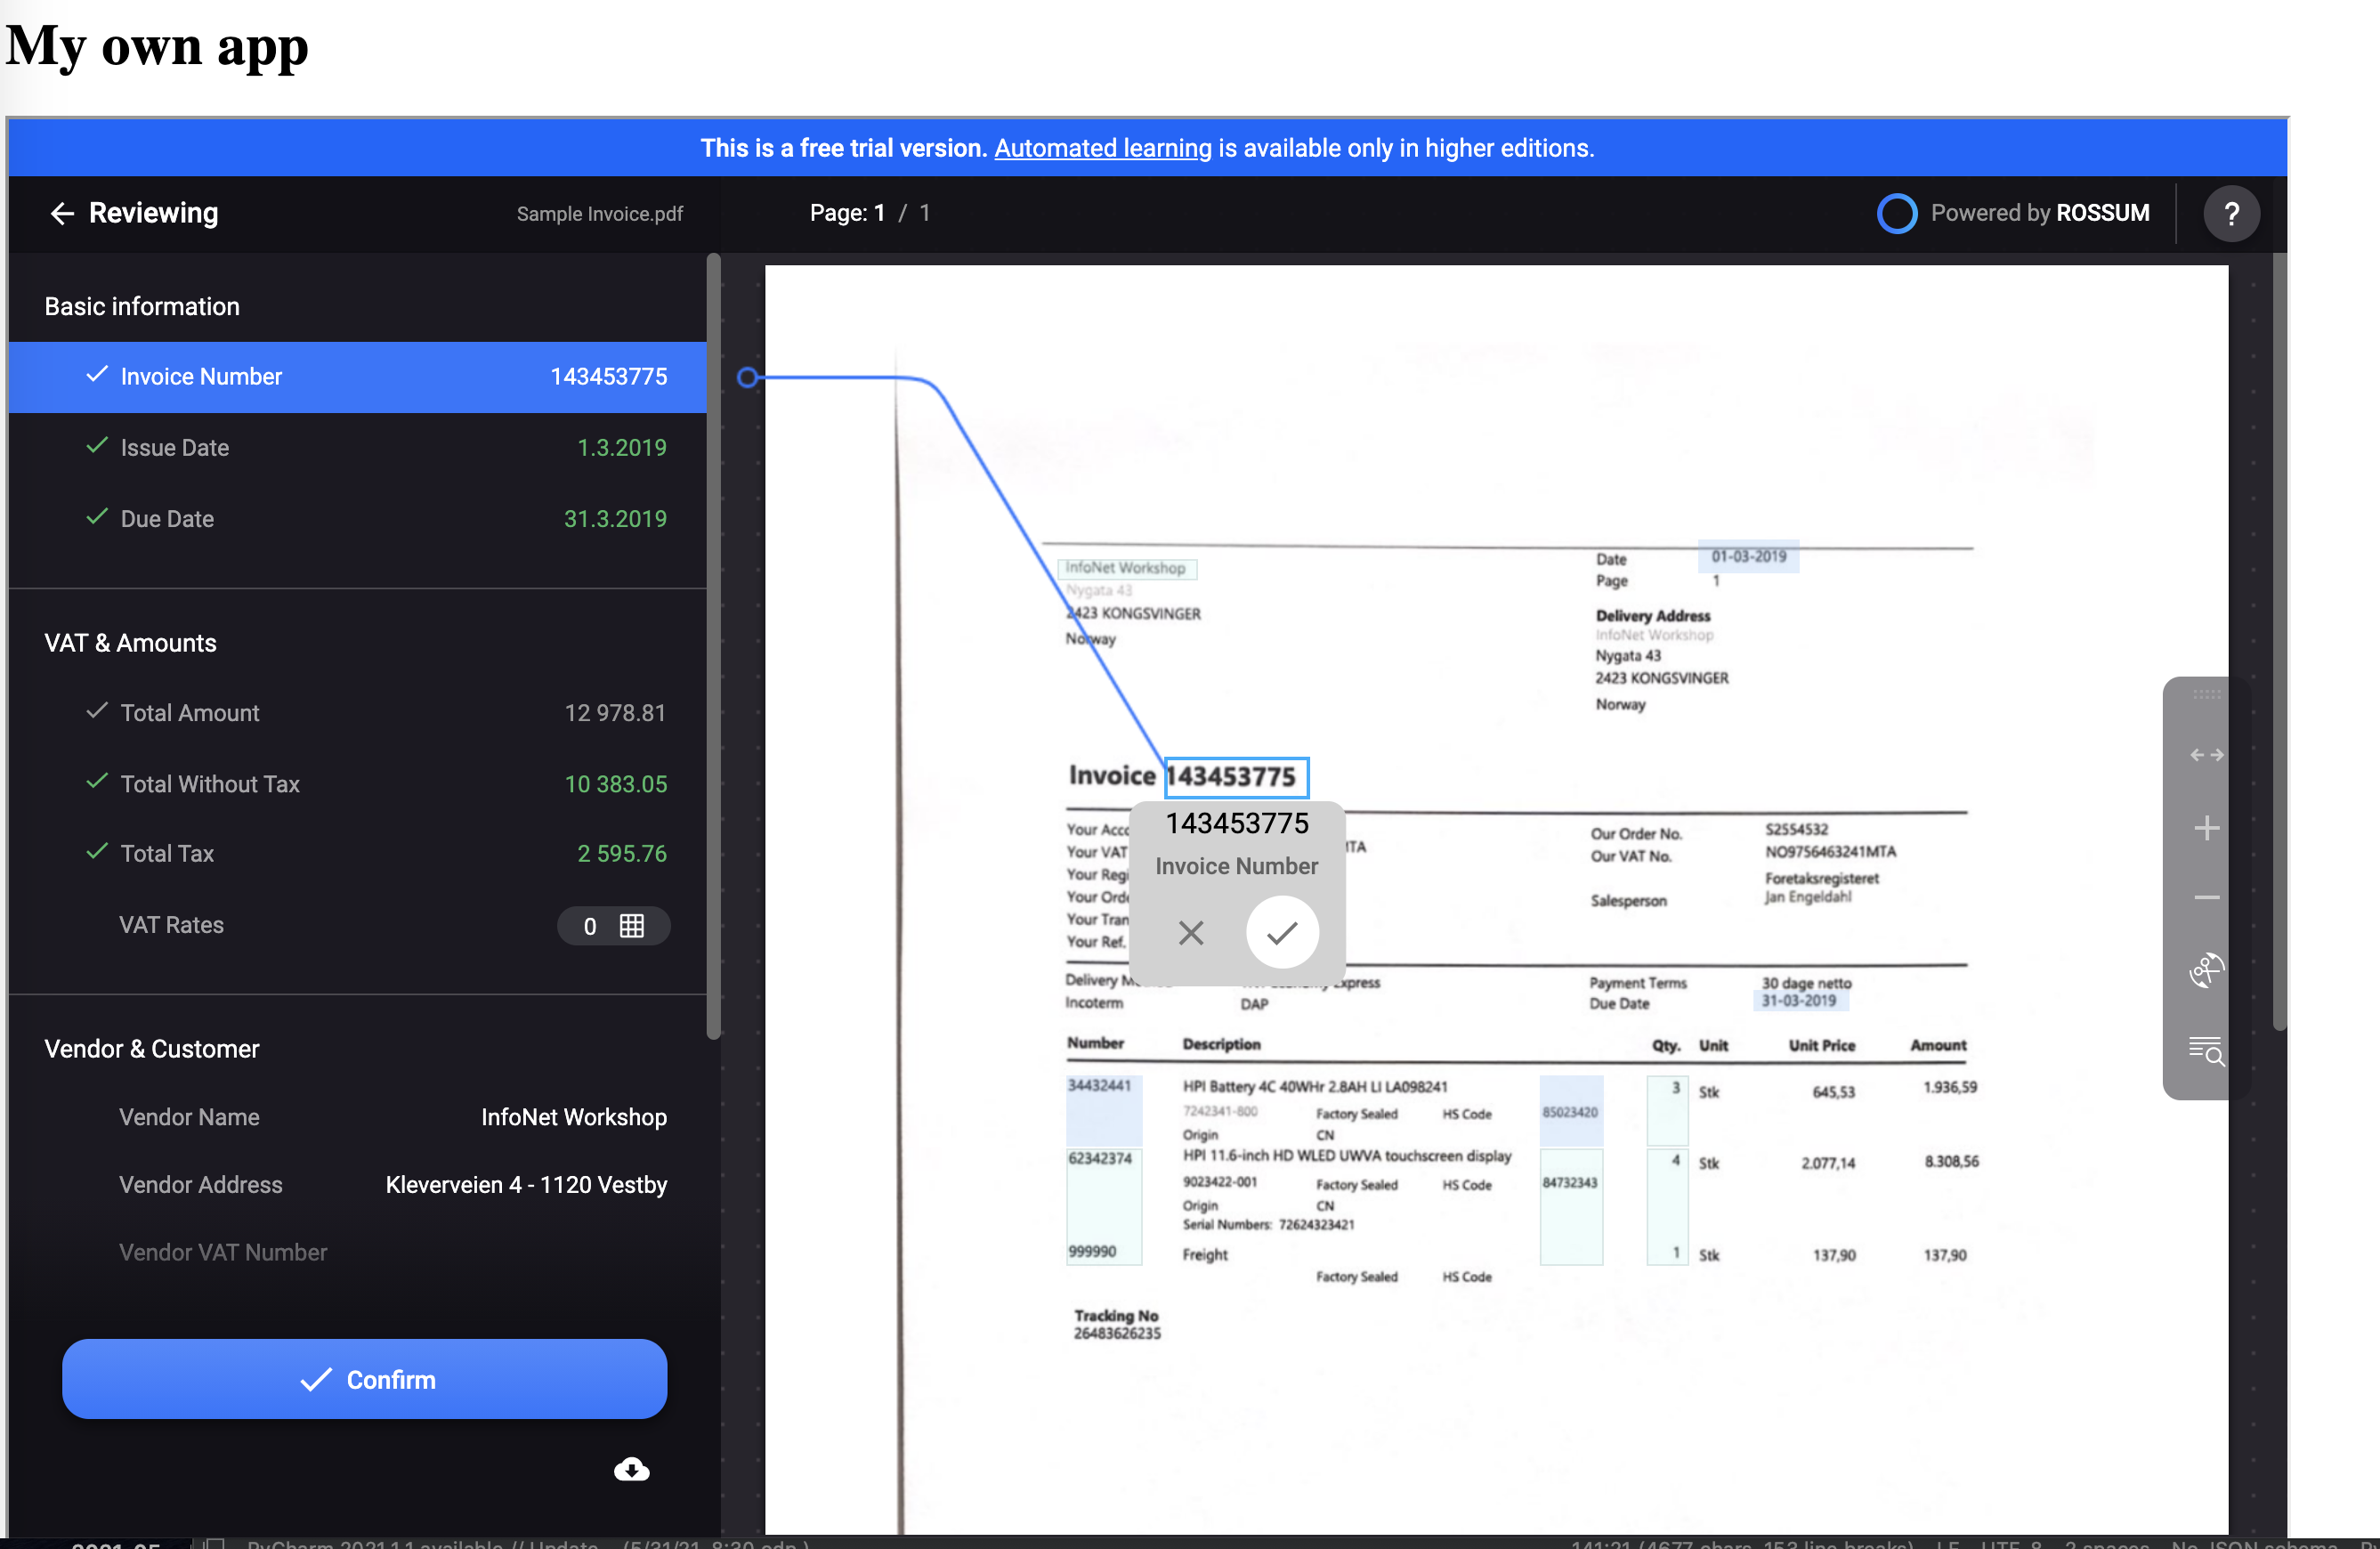
You can use the IFrame object if you want to embed Rossum's validation screen directly in your application. You can see an example of the HTML snippet below.
<html>
<body>

<h1>My own app</h1>

<iframe iframe src="https://example.app.rossum.ai/embedded/document/2707700#authToken=00c7ce2f7f0f8ebf91f80b9e22ca204eb0e22b3b" style="width: 1280px; height: 800px"/>
</iframe>

</body>
</html>
How to handle different user actions from the Rossum's IFrame
You might want to react differently to user actions performed in Rossum's validations screen. A typical example would be that you would like to:
- Take the user to your document detail after deleting the document in Rossum.
- Take the user to your document detail after postponing the document.
- Take the user to another document in Rossum after clicking on the confirm button.
In Rossum, you can define where the user is taken after each user action in Rossum by specifying special parameters of the create-embedded-url-for-annotation:
- return_url
- delete_url
- postpone_url
If you would like to highly customize the logic where the user is taken, you can write your own handler of the returned URL in the IFrame.
In other words, clicking on the confirm button in Rossum could redirect the user to "https://my-company-application.com/success" in the IFrame. The IFrame would contain a handler that could redirect the user to a new document to make the workflow smooth. Or you would catch the "https://my-company-application.com/delete" action and redirect the user to a detail of the document in your system. You can do that by using the postMessage from the child page to the parent webpage.
You can get inspired by the implementation of the custom Iframe handling here.
Storing the one-time document URLs
When storing the document URLs generated by the create-embedded-url-for-annotation endpoint, keep in mind that the URLs have a limited lifetime and that the link will expire in up to 162 hours. Therefore, you should call the create-embedded-url-for-annotation endpoint every time the user wants to open the document in Rossum.
Using the create-embedded-url-for-annotation endpoint can show documents in all Rossum states such as "reviewing", "exported", or "deleted".
Hiding buttons in Rossum's validation screen
You can customize the visibility of the following buttons in the Rossum validation screen:
- Delete icon is shown only if the delete_url is provided.
- Postpone icon is shown if the postpone_url is provided.
- Downloading the original document icon can be hidden if needed. Contact [email protected] if needed.
- Editing icon for splitting and rotating documents can be hidden if needed. Contact [email protected] if needed.
Embedding the whole Rossum application into your system
Embedding the Rossum application, i.e., the document dashboard, settings, and validation screen, can only be done on demand. By default, Rossum supports only the embedded Rossum mode in IFrame. Embedding the "elis.rossum.ai" into the IFrame would result in an error since it does not allow IFraming. Contact us at [email protected] if you would like to embed the whole app. However, keep in mind that this is a paid add-on.

Standard Rossum app cannot be put into IFrame.

Error seen when trying to embedded the whole app by default.
Updated 7 months ago